
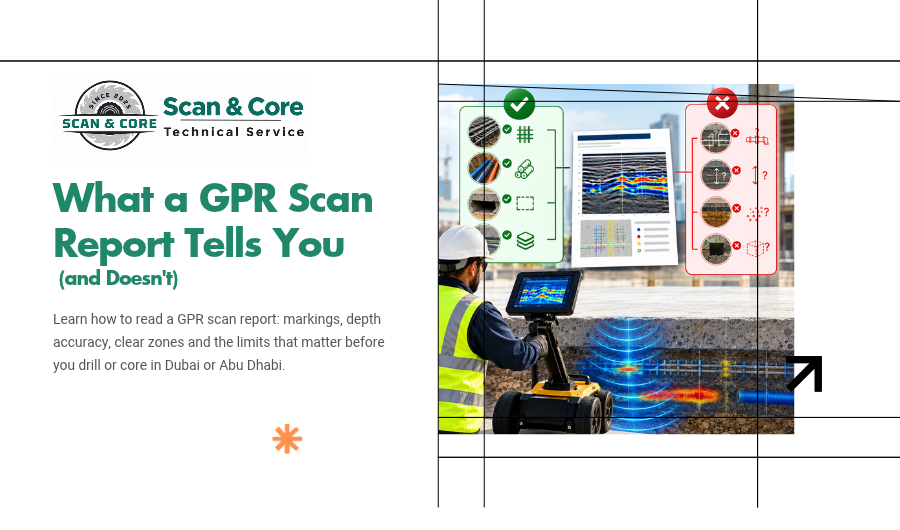
The scanning is done. The concrete is covered in paint marks and tape, and a PDF lands in your inbox. Now what? A GPR scan report is only useful if the people drilling, cutting and signing off the work read it properly. Here are the questions we hear most, answered plainly. What should a GPR scan report include? A complete report usually covers: If your report is a single page with a few photos and no limitations section, ask for more. What do the colours on the concrete mean? There isn’t one universal colour code for scan markings. Many teams use different colours for rebar, post-tension cables and electrical or other services, and some mark clear zones for drilling separately. The rule is simple: the report must include a legend, and the crew must read it. Never assume red means the same thing on every site. How accurate are the depths? Depth accuracy depends on calibration. Radar travels at different speeds through different concrete mixes, so the technician needs to calibrate on site. That might mean matching the scan to a known depth, such as an existing core hole or the slab edge, or using the shape of the radar reflections to estimate signal speed. A good report says how depth was calibrated and gives a realistic tolerance. Treat depths as close estimates, not exact measurements, and build that margin into your drilling depth. Does the report tell me whether something is rebar, a PT cable or a conduit? It tells you what the technician believes each target is, based on its depth, spacing, pattern and signal strength. For example, evenly spaced targets at a steady depth usually mean rebar. A single target that rises and falls across a slab is typical of a post-tension tendon. These are expert interpretations, not certainties. A good report says when a target couldn’t be identified with confidence and marks it as something to avoid. What’s a “clear zone”? It’s an area where the scan found no targets within the scanned depth. Clear zones are where drilling or coring is safest. Two cautions. First, “clear” only applies to the depth that was scanned. Second, it only applies to the exact area that was scanned. Moving a core 300mm to the left puts it outside the scan. What the report doesn’t tell you This is where problems start. People read a clean report and assume more than it covers. Does it tell me whether a conduit is live? No. GPR detects that an object is there. It can’t tell whether a cable is carrying power. Treat every conduit as live until the building’s electrical team confirms otherwise. Does it cover what’s below the maximum scan depth? No. Anything deeper than the scanner’s range isn’t covered. If your core will go through a thick slab or transfer beam, check the report’s stated depth range against your full drilling depth. What about slabs on metal decking? GPR can’t see through the steel deck. A report on a composite slab will show the deck, but not what’s hanging under it. You’ll need to check the underside separately. Does it confirm the concrete is structurally sound? No. A scan maps what’s inside the concrete. It doesn’t assess strength, cracking or whether the element can take a new opening. That’s a job for structural analysis and, if needed, concrete testing. Does it give permission to drill? No. The report is information. Approval to drill or cut comes from the structural engineer, the consultant and building management. How long is a scan report valid? A report is valid for the exact locations scanned, as long as the markings are still there and nothing has changed. Paint gets cleaned off, tape gets pulled up, and drilling positions move. If the marks are gone or the location has shifted, scan again. It costs far less than a strike. Who should read the report? Everyone involved in the drilling decision: What are the warning signs of a weak report? What should I do if the report shows a problem? If your planned core or cut clashes with a PT cable, a live service or dense reinforcement, don’t drill. Speak to the engineer about moving the location. Often a shift of a few centimetres solves it. If the location can’t move, the engineer will advise on the next step. Get a report you can actually use Scan and Core provides GPR concrete scanning across Dubai and Abu Dhabi, with clear on-surface marking and a written report that states what was found, how it was measured and what it doesn’t cover. If you need cutting or coring afterwards, we can do it in the same visit. Contact Scan and Core to book a scan, or call +971 56 861 9006.
Pre-Drilling Scan Checklist for Abu Dhabi Sites
Pre-Drilling Scan Checklist for Abu Dhabi Contractors Abu Dhabi is busy. In the first quarter of 2026 alone, work start notices rose 14.3% to 3,244 and site inspection requests climbed 24.5% to 34,391, according to the Department of Municipalities and Transport (Abu Dhabi Media Office). More sites mean more cores, more anchors and more penetrations, and more chances to hit a post-tension cable or live conduit. This checklist takes you from paperwork to the first hole, so nothing gets missed. Print it, share it with your supervisor, and tick it off on every job. Stage 1: Paperwork and approvals ☐ Drilling locations confirmed on drawings. Every core, anchor and penetration is marked on an approved drawing with dimensions from fixed gridlines. ☐ Structural drawings collected. Get the slab and wall reinforcement drawings, and PT shop drawings if the slab is post-tensioned. ☐ MEP drawings collected. Embedded conduits and pipes should be shown, though don’t rely on them alone. ☐ Engineer’s approval in hand for any penetration in a structural element. Large openings may need a structural analysis first. ☐ Building or community management NOC obtained. Occupied buildings will also set approved working hours. ☐ Authority permits checked. Structural modifications in Abu Dhabi fall under the Department of Municipalities and Transport. Confirm whether your scope needs a permit before you start. ☐ Method statement and risk assessment prepared. Abu Dhabi’s occupational safety framework, now called ADOSH-SF (formerly OSHAD-SF), expects activity-specific risk controls on construction sites (ADPHC). ☐ Permit to work issued under the site or building’s own system. Stage 2: Preparing for the scan ☐ Scan areas marked out. Mark each drilling location plus a margin around it, so the crew has room to adjust if the first spot isn’t clear. ☐ Surface cleared. Remove debris, loose items, rebar offcuts and standing water from the scan area. ☐ Floor finishes checked. GPR can scan through many tiles and screeds, but tell the scanning team what’s on top so they can plan for it. ☐ Metal decking identified. If the slab sits on steel deck, GPR won’t see through it. Plan to check the underside. ☐ Access below arranged where needed, for checking soffits or confirming what’s under the slab. ☐ Slab thickness known or requested. Your drilling depth depends on it, and GPR can often measure it from above. Stage 3: On scan day ☐ Brief the technician. Tell them what you’re drilling, the diameter, the depth and whether the slab may be post-tensioned. ☐ Scan in both directions. Grid scanning in two directions gives a far more reliable picture than single lines. ☐ Markings made directly on the concrete with a clear colour legend. ☐ Clear zones identified for each drilling position. ☐ Photos taken of every marked area, with gridline references visible. ☐ Walk the marks with your crew before the technician leaves, so everyone understands the legend. Stage 4: Before the first hole ☐ Report received and read. Check the findings, depth range and limitations. Our guide to what a GPR scan report tells you covers what to look for. ☐ Markings still intact. If paint or tape has been cleaned off or damaged, rescan. ☐ Drill position matches the scanned position. If the location has moved, even slightly, it’s outside the scan. ☐ Drilling depth set below slab thickness where the core shouldn’t break through, with a margin for depth tolerance. ☐ Services isolated where possible. Ask the building’s electrical and plumbing teams to isolate nearby circuits and lines. ☐ Any PT doubt escalated. If there’s any uncertainty about a tendon near the drill position, stop and speak to the engineer. ☐ Water and slurry controls ready. Wet vacs, containment and protection for finishes and floors below. Stage 5: While drilling ☐ Operator watching for unexpected resistance. A sudden change in feel or sound can mean steel. ☐ Stop if steel is hit unexpectedly. Don’t push through. Pull out, check and consult before continuing. ☐ Check the floor below for water leaks or falling debris. ☐ Record each core with its location and depth. Stage 6: After drilling ☐ Cores and slurry removed and disposed of properly. ☐ Holes protected until pipes or sleeves go in. ☐ Records updated so as-built drawings show every new penetration. ☐ Scan report filed with the project documents for handover. Why this matters Scanning alone doesn’t prevent strikes. Problems still happen when a mark gets cleaned off, a core moves 200mm, or nobody reads the report’s limitations. This checklist closes those gaps. Book your pre-drilling scan Scan and Core provides GPR concrete scanning and core drilling across Abu Dhabi and Dubai. We scan, mark, report and, if you need it, drill in the same visit. Contact Scan and Core to schedule a scan, or call +971 56 861 9006.
GPR vs X-Ray Concrete Scanning: Which to Choose?
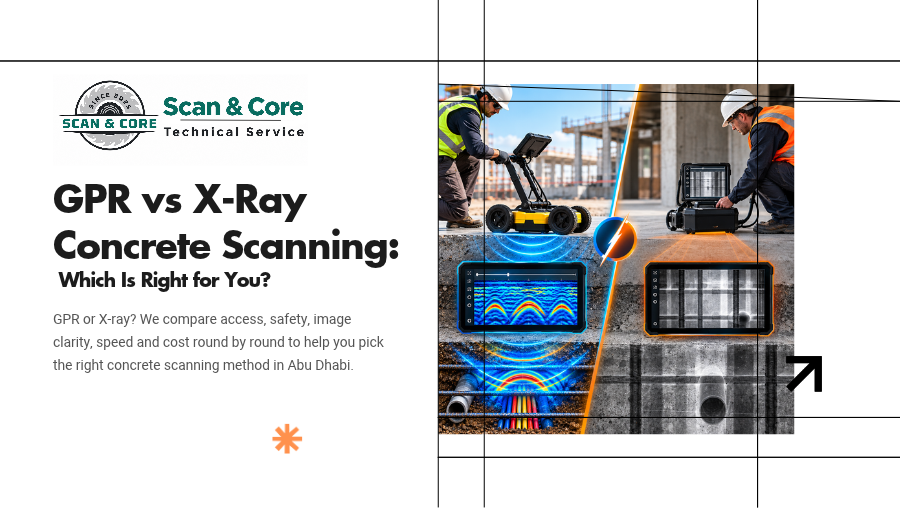
You need to drill or cut into a slab and you want to know what’s inside first. Two technologies can show you: ground penetrating radar (GPR) and X-ray imaging, also called concrete radiography. Both work. They just suit different jobs. This post puts them through eight rounds, one factor at a time, so you can see which fits your project in Abu Dhabi or anywhere else in the UAE. If you’re new to GPR, start with our explainer on how GPR concrete scanning works. The quick version GPR sends radar pulses into the concrete from one side and reads the echoes. It’s fast, portable and radiation-free. X-ray passes radiation through the concrete onto a film or digital plate on the other side. It produces a photo-like image of everything in its path. Now the rounds. Round 1: Access GPR: Needs one side only. You scan the top of a slab or the face of a wall and that’s it. X-ray: Needs both sides. The source goes on one face and the imaging plate on the other. For a suspended slab, that means access to the floor above and the ceiling below. Winner: GPR. Slabs on grade, retaining walls, and any element with one face buried or blocked rule out X-ray straight away. Round 2: Safety and site disruption GPR: Uses low-power radio energy. Nobody has to leave the area. The team can scan while other trades keep working nearby. X-ray: Uses ionising radiation, so the area around the shot has to be cleared and controlled. In the UAE, industrial radiography is licensed and regulated by the Federal Authority for Nuclear Regulation (FANR), whose guidance covers exclusion distances, worker dose limits and qualified radiographers (FANR). In occupied buildings, that often means working at night or on weekends and clearing floors above and below. Winner: GPR. In a working office tower on Al Maryah Island or a hospital in the city, clearing zones is often not practical. Round 3: Image clarity GPR: Produces a radar profile made of curved reflections. A trained technician reads it and marks targets on the surface. It’s highly reliable, but it’s an interpretation rather than a picture. X-ray: Produces a clear, photo-like image. Rebar, cables, conduits and even the strands inside a tendon show up in sharp detail, and overlapping objects can be told apart. Winner: X-ray. When you need to see exactly what’s there, especially in a congested area, nothing beats a radiograph. Round 4: Depth and thickness GPR: A typical handheld concrete unit scans up to around 500 to 600mm deep. Dense reinforcement near the surface can shadow targets below it. X-ray: Works through the full thickness because it’s imaging all the way through, but thicker sections need stronger sources and longer exposures. Portable setups are most practical on slabs and walls of moderate thickness. Winner: Draw. Both handle typical building elements. For very thick or heavily congested sections, ask your specialist which will give usable results. Round 5: Speed GPR: Results appear on screen as you scan. A technician can cover a large area and mark it up the same visit, and cutting can often start right after. X-ray: Each shot covers a limited area and needs setup, exclusion, exposure and processing. Several locations can take a full shift or more. Winner: GPR. On a tight programme, real-time results make a big difference. Round 6: Area coverage GPR: Built for coverage. Scan a whole floor plate, a long wall or a series of core locations in one visit. X-ray: Built for spot checks. Each image covers a small panel, so large areas get expensive fast. Winner: GPR. Round 7: Cost GPR: Lower cost per location and per square metre. Minimal setup, no exclusion zone, no out-of-hours premium in most cases. X-ray: Higher cost per shot, plus the knock-on costs of clearing areas, night work and licensed radiographers. Winner: GPR for most jobs. X-ray earns its cost on critical locations where you need certainty. Round 8: What each one can tell you GPR: Locates rebar, post-tension cables, conduits (metal and plastic), voids and slab thickness. It measures cover depth well. X-ray: Shows the same targets in more detail and can reveal things GPR might struggle with, such as a conduit sitting directly under a bar, or the exact layout inside a congested beam-column joint. Winner: X-ray. GPR still handles everyday locating very well, but for the hardest questions, X-ray shows more. Final score GPR 5, X-ray 2, one draw. GPR wins on practicality. X-ray wins on detail. Choose GPR when For most drilling, coring and cutting jobs in Abu Dhabi and Dubai, GPR is the right tool. Choose X-ray when Or use both On high-risk jobs, the two work well together. GPR scans the wider area quickly and flags any location that’s hard to read. X-ray is then used only on those few spots. You get full coverage at GPR cost, with X-ray certainty where it counts. Talk to Scan and Core Scan and Core provides GPR concrete scanning across Abu Dhabi and Dubai, with on-surface marking and a written report for every job. If your project needs a deeper look, we’ll tell you whether it’s worth adding another method before you start cutting or coring. Contact Scan and Core to discuss your project, or call +971 56 861 9006.
What Is GPR Concrete Scanning? How It Works
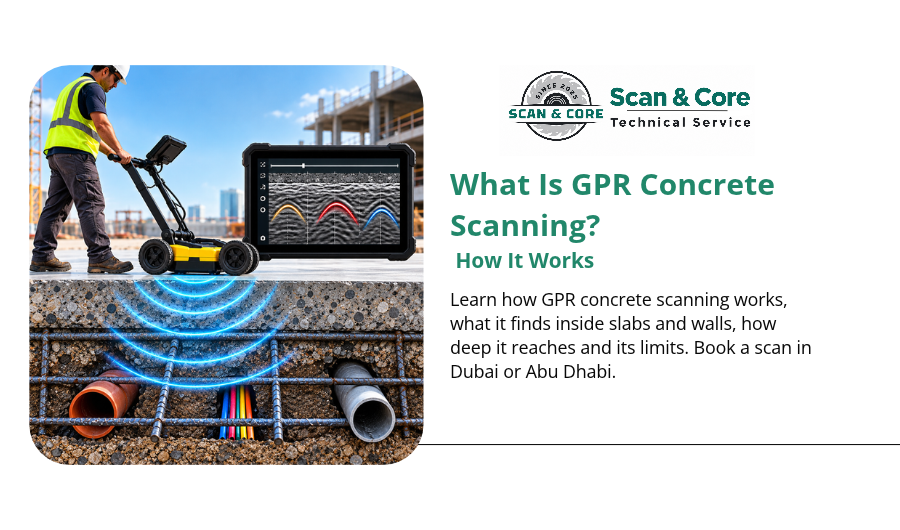
Concrete looks solid and uniform from the outside. Inside, it’s crowded. A typical slab in a Dubai tower carries layers of rebar, post-tension cables, electrical conduits and sometimes plumbing, all hidden behind a plain grey surface. GPR concrete scanning lets you see that hidden layout before anyone drills, cuts or cores. Here’s what the technology is, how it works, what it can find and where its limits are. What GPR stands for GPR means ground penetrating radar. The name comes from its original use: looking into soil for pipes, cables and buried structures. The same principle works in concrete. Dedicated concrete scanners use higher-frequency antennas than soil units, which gives sharper detail at the shallower depths found in slabs, walls and columns. How GPR works Think of it like an echo. 1. The antenna sends a pulse. The scanner is rolled across the concrete surface. As it moves, the antenna fires very short pulses of radio energy into the concrete, thousands of times per second. 2. The pulse hits something different. Radar energy travels through concrete until it meets a material with different electrical properties. Steel, plastic conduit, air voids and the bottom of the slab all behave differently from the concrete around them. 3. Part of the signal bounces back. At each of those boundaries, some energy reflects back up to the antenna. Steel reflects strongly. Plastic and air reflect more weakly, but they still show. 4. The scanner times the echo. The system measures how long each reflection took to return. Longer time means deeper target. Combined with the known speed of radar through concrete, that gives a depth reading. 5. The data builds an image. As the scanner rolls along, those readings stack up into a cross-section of the concrete, displayed on screen in real time. What a GPR scan image looks like The screen doesn’t show a neat picture of a bar. It shows a curved shape, a bit like an upside-down “U”, called a hyperbola. That shape forms because the antenna “sees” a target before it’s directly above it, while it’s overhead, and after it has passed. The peak of the curve marks the target’s exact position and depth. A row of evenly spaced hyperbolas usually means a rebar mat. A single hyperbola at an unusual depth, or with a draped profile across a slab, can point to a post-tension tendon. Reading those patterns correctly is where technician experience matters most. What GPR concrete scanning can find A good scan can locate: That last point is useful. Because GPR works from a single face, you don’t need access to the underside of a slab to know how thick it is or what’s inside. How deep and how accurate is it? It depends on the antenna. Higher frequency gives finer detail but less depth. Lower frequency reaches deeper but with less resolution. For a sense of scale, a widely used handheld concrete scanner with a 2.7 GHz antenna reaches up to about 60cm deep, with horizontal measurement precision of around 1.2mm according to the manufacturer’s specifications (GSSI). That’s plenty for most slabs, walls and columns in residential and commercial buildings. Depth readings are usually accurate to within a small margin once the scanner is calibrated to the concrete on site. That calibration step is one of the things that separates a reliable scan from a rough guess. What GPR can’t do GPR is powerful, but it isn’t magic. Know the limits before you rely on it: GPR vs other methods GPR isn’t the only way to look inside concrete, but it’s the most practical for most sites. It needs access to one side only, gives results on the spot and uses no radiation, so nobody has to clear the area while scanning. X-ray imaging can give sharper pictures in some situations, but it needs access to both sides and a safety exclusion zone. We’ll compare the two properly in a separate post. What happens on a scanning job A typical visit looks like this: Why it matters on Dubai projects Dubai’s building stock includes a lot of post-tensioned slabs, dense reinforcement and embedded services, and a lot of work happens inside occupied buildings. Hitting a PT cable or live conduit is dangerous, expensive and disruptive. A scan takes a fraction of the time of a repair. It’s the step that makes safe concrete cutting and coring possible, and it gives your structural engineer real data to work with. Book GPR concrete scanning in Dubai Scan and Core provides GPR concrete scanning across Dubai and Abu Dhabi, with on-surface marking and a clear report after every job. If you’re also cutting or coring, we can scan and cut in the same visit. Contact Scan and Core to book a scan, or call +971 56 861 9006.
